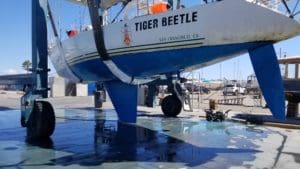
My 45-foot Morgan sloop, Tiger Beetle, is back in the water following a good haul out, bottom job, and replacement speedo through-hull at The Boatyard in Channel Islands Harbor, California. The yard was efficient, the travel lift had an excellent operator, the place was clean, and I was able to do my own work. Eight days from lift to launch and all went well.
Below are some of my practices that help make a haul out an enjoyable event.
Have all materials in hand before haul out
It’s no fun to run out of materials in the middle of a haul out; lay days are expensive and that’s not the time to be driving around looking for paint, mix buckets, thinners, tools, etc. Well before the haul out I create a list of work to be done, break down tasks into the materials needed, then source those materials. Some items have a long lead time. For example, zincs and grease for the MaxProp are often not locally available. Rollers, extension handles, ladders, paint trays, masking tape — everything for painting should be on hand. Fiberglass, resins, fillers, and solvents are needed if doing glass work. A sander and a high efficiency particulate air filtration (HEPA) vacuum cleaner may be a rental requirement if HEPA filtration is required and you don’t own such a unit.
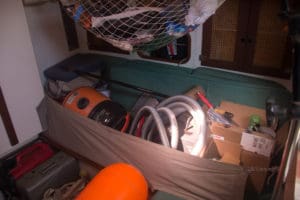
I purchase and have on board everything needed to complete the haul out well before the haul out date. This includes the bottom paint — don’t depend upon the yard to set aside the three gallons of blue paint for your boat; pick up the paint in advance and put it on the boat. That’s the only way to know it’s in hand prior to the lift.
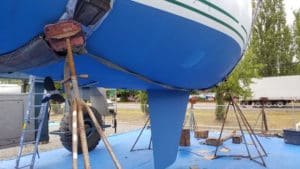
Have photographs of the boat in slings
When I’m out cruising, each haul out occurs at a different yard, and that yard has never seen my boat before. I bring photographs of the boat in slings from prior haul outs, ideally taken from the side and clearly showing the keel root to the cabin level with slings in place. I show them to the operator and we discuss where the slings should hit (and where they should not), where the prop shaft is, and in my case there’s a bronze clam-shell at the watermaker intake the sling needs to miss. We also discuss air clearance of the travel lift beam, draft and height of lift needed, where the pads should be placed, and whether or not the headstays need to be removed. The specific lift equipment available at the yard will factor into the placement of the slings — absolutely discuss their use on your boat with the operator.
“Sling Here” labels at the deck edge also help the travel lift operator — though depending upon the size of the lift the yard may (or may not) be able to position slings at those points. It’s a good idea to check that the slings are connected by a strap to prevent them from sliding out of position along the hull.
Remove sensors, sails, prep the deck
Doublecheck that the speed sensor, which usually protrudes from the hull, is removed and replaced with the plug prior to the lift; if that is forgotten the sling is likely to crush the sensor. Remove any other sensors as needed.
Boat yards are dusty, messy places and the deck is likely to get dirty. I remove everything I don’t want to clean afterwards — furling headsails are dropped, bricked, bagged, and placed below. Clear running rigging, cushions, etc. from the deck — keeps things cleaner. Arrange old beach towels on deck where the ladder will be placed, then wipe shoes on the towels after climbing the ladder.
Sand the bottom carefully
I use hard epoxy bottom paint and that requires sanding to remove the old paint film as well as to create a “tooth” giving the new paint a better grip. Use 80-grit paper on a random orbital sander. I hook the sander up to a commercial 150-cubic-feet-per-minute HEPA filtration vacuum cleaner (not your regular ShopVac). When sanding keep the sander flat against the hull and take your time; avoid the temptation to speed things up by using the edge to hit low spots — sanding on edge creates a half-moon divot in the hull. Have lots of sand paper available, wear a good respirator and hearing protection, and keep the vacuum cleaner running.
The reason I prefer to sand the bottom myself is that I am able to spend more time where it counts. For example, running a power sander down the leading and trailing edges of the keel and rudder can/will flatten out the shape. It’s much better to hit those areas by hand and retain the shape, even though this takes more time.
Use six-inch foam “hot dog” rollers for a smooth finish
Smooth paint creates less drag and is faster through the water than rough paint. Spraying paint produces the best finish, but I’m not racing the boat now, therefore a spray job is more expensive than I can justify. After a spray job the next best paint job is using a six-inch foam hot dog roller to carefully roll on thinned bottom paint. This takes much more time than using a nine-inch nap roller, plus the cost of the thinner, but is just as easy to do. Thinners are bottom-paint specific, make sure to use the correct thinner for the paint you’re using.
Not all foam rollers are made the same and some will fail when exposed to the bottom paint thinner. Test a roller against the thinner in advance to verify the foam doesn’t dissolve and doesn’t separate from the roller core. When you find a good roller purchase a bunch of them (I will go through 18 when applying three gallons of paint over three days).
At launch, tell the lift operator about any through-hull work
Lastly, at the launch, let the lift operator know about any through-hull work that was done — particularly important after I’ve replaced the prop shaft stuffing box flax (which is not flax but instead a graphite and Teflon square cord). With the boat on the hard it’s impossible to know how much force to apply to the stuffing nut, so I will ask the lift operator to put the boat in the water and keep the slings in place while I inspect the box and any other through-hull work that I did. The stuffing nut always requires tightening, and if something goes wrong the operator can pick the boat straight up out of the water again.
Hopefully the above ideas might make your next haul out go smoothly.
Rob MacFarlane has raced and cruised as a singlehander for 30 years on San Francisco Bay, the West Coast, Hawaii, Mexico, Canada and French Polynesia.