The tools
The sewing machine onboard Beetle is a Sailrite LSZ1, essentially a walking-foot upholstery machine with straight and zig-zag (but not Federal 308, four-point stitch), which handles threads from Tex 30 to 135 for repairs in everything from spinnakers to the mainsail. Fortunately, I have not had to make many sail repairs underway, the exceptions being a damaged light-air staysail and the No. 2 genoa. However, the machine does get used at anchor for building and repairing all sorts of fabric components for the boat: noseeum screens on hatches and companionway, winch covers, mainsail covers, deck awnings, handheld VHF bags, interior cushions… the list goes on. It even gets used on clothes sometimes.
I originally purchased the machine when I wanted a custom, pram-style, flip-down dodger prior to the Singlehanded TransPac race. The local marine canvas shop quoted $3,200 for the build, and my response was, “You just justified purchasing an expensive Sailrite.” Their response: “Go for it.” Turns out, the sailmaker has a design they build to, but my design was entirely different, and they had no interest in getting involved. I built it, it was great, I showed it to them afterwards and they were impressed. However, I can’t claim the design; I borrowed the idea from a dodger I’d seen on a Swan 44.
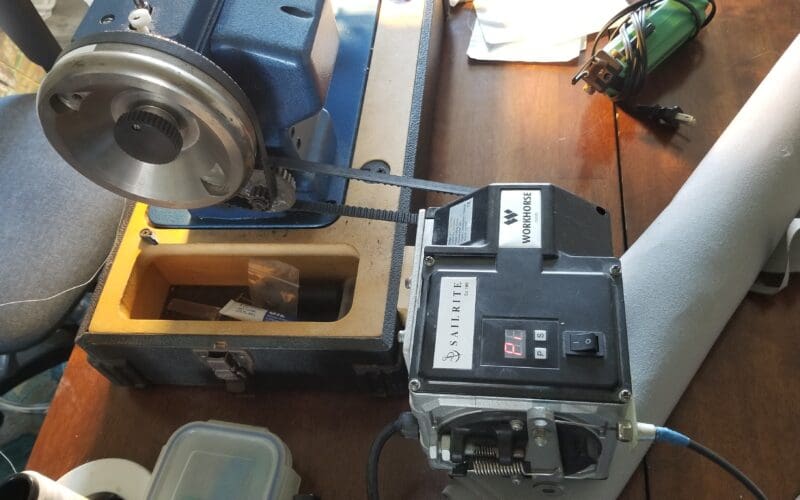
The machine, as delivered, ran too fast for me to control, so I replaced the small AC motor with an industrial 3/4 horsepower servo motor bolted to the machine’s case. The motor is controlled by a Bowden cable and a foot-operated lever a bicycle shop helped put together. The motor provides significant torque at a controllable, slow stitch speed when needed.
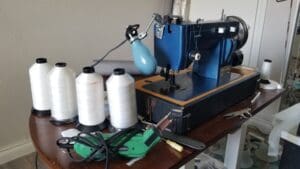
Besides the machine, I bring along a 16-ounce spool each of Tex 45, 70, 90, and 135 bonded polyester thread; packs of Schmetz 135×17 needles, size 10-22; and sufficient spare parts to keep the machine running, including belts, bobbin cases, springs, oil, etc. I also keep several yards of 6.5-ounce Dacron sail cloth, yardage of Sunbrella for canvas work and a length of Phifertex for replacing the sheet bags as the sun cooks them. Basting is extremely helpful for holding in alignment layers of cloth prior to running through the machine.
The limitations of the machine are the relatively small, under-arm clearance through which material must pass if you’re working on the center of a sail; a maximum thread size of Tex 135; max zig-zag width of 5mm; and max clearance of 3/8 inch below the needle and foot, which limits what the machine can work on.
In addition to the sewing machine, there are more than a few items to consider having along, including No. 2 spur grommets, plus hole punch and anvil for setting them; sailmaker’s palm, plus needles and thread; a Speedy Stitcher awl for thick corners; a hot knife for cutting and sealing fabrics; a straight edge and pencils for marking layouts; four-inch width Dacron insignia cloth (aka Stickyback) and various presser and feed feet to handle zippers.
Useful ideas
When stitching through a heavy clew patch, it helps to mark out with a Sharpie pen the holes you want to hit. Chuck up the tiniest bit in a drill, and then drill through the fabric with the drill in reverse. This will create a gap for the needle to pass through without catching or tearing the fabric threads. Drill, stitch, drill, stich, repeat to the end.
Clean the area to be repaired with alcohol, dry and then align the fabric as well as possible. Use small strips of Dacron sticky-back insignia cloth on both sides across the tear to hold the fabric in alignment. Then place a full width of Dacron to cover the tear, first rounding the corners of the sticky-back to reduce chance of corners peeling away, and then stitch the perimeter of the tear. The repair can be further reinforced by sewing across the patch with an X pattern from corner to corner.
When sewing through basting tape, the needle can gum up, at which point the machine will start to skip stitches. Wipe down the needle with alcohol and cloth to remove the gum, and then continue stitching.