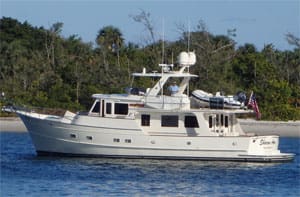
Previously we touched on some of the details involving staying in charge of your trawler’s 12V DC battery bank system. The next step is to develop a working understanding of how your ship’s 120V system is designed and installed to help ensure you keep current with your AC power demands.
Direct current power from 12V batteries furnishes the lifeblood for your electrical system on board; by connecting through an inverter, 120V AC (alternating current) is provided to supply the home-style niceties that trawler owners have come to expect for comfortable cruising. Your inverter/charger is a “magic box” that will not only charge your 12V batteries (bulk deep-charging and float-level topping off) from shore power, generator or engine alternator, but can also take the electricity from your 12-volt house battery bank and invert it into AC (typically 120 volts) for your duplex electrical outlets and other appliances.
I think of 12V DC as essential for operations of nav/com, lights, etc., and I rely on an inverter/battery charger to keep my batteries topped off. If 12V power is for the necessities, then 120V AC is for the niceties — the comfort and convenience components that are powered by plug-in wall outlets, ranging from galley appliances through water heaters and laundry equipment.
 |
|
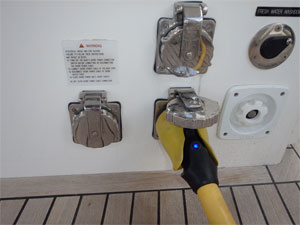
This model of shore power cord has an LED indicator light to show it is energized. |
AC current delivered from dock shore power feeds your trawler electricity through a shore power cord. Shore power (typically 30 amps or 50 amps) is often overlooked because we just “plug and play,” taking it for granted. There are a few key elements you need to be aware of and understand, starting with making sure that the breaker box on the dock connection can be turned on and off and that it will trip if overloaded. One of the first “treasure hunts” I conduct with new owners is to find the onboard shore power connection breaker boxes. These are typically installed near the shore power deck connections (but are sometimes hidden inside an interior locker or tucked up and away not easily seen) and should be clearly labeled so that you can flip them back on if they are tripped off. I like to make a simple label — “UP is ON” — inside these breaker boxes so I have a quick reminder to confirm the proper orientation at a glance. If you have shore power connections forward and aft, then you will have two breaker boxes to find and a shore power select switch on your electrical panel that needs to be pointed to the correct location.
Checking voltage level
You also need to know how to check the voltage level on your primary circuit breaker panel to see exactly how much voltage is coming in and that your dock power is close to 120 volts (lower than 100 volts of shore power coming in can damage some sensitive electrical components). Larger trawlers may install boost transformers to keep the voltage up; this becomes more important the farther away your slip is from the primary power source. If the dock shore power tower breaker is off or your onboard shore power breaker has tripped, you can potentially discharge your batteries as the inverter/charger is not able to replenish them and you will eventually run too low to operate equipment. This can have disastrous results as it can negatively affect the cold storage of food and also disable your automatic bilge pump from operating. One tip: Some of the newer shore power cords on the market have a light diode that shows they are energized.
 |
|
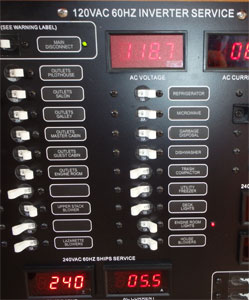
An AC electrical panel with both a voltage meter and an amp meter and separate sections for 120- and 240-volt circuits. |
I’ve also seen some owners install shore power alarms on board that signal if the shore power has become disconnected. If you are on board your boat you will hear the alarm, and if you are away from your boat this type of alarm can alert your dock neighbors or the marina manager that power has been cut off.
Most popular brand inverters have an AC-IN light on their display panel that shows when shore power is coming into the vessel. This is the first thing I look for when I come on board and the last light I check before locking up so I know my shore power connection is working.
It is important to take some time to become familiar with your electrical panel to learn how many amps each individual breaker provides. You can use this information to monitor your energy management to make sure you balance your loads and are not consuming too many amps to deplete your voltage. It is an ABYC requirement that AC panels have a lock and key for access to the backside. For safety, most builders also install a clear plastic cover to shield the wires and connections to avoid shocks. You must be extremely careful when working around AC electricity. It is also common to have a reverse polarity warning light on your panel for safety.
 |
|
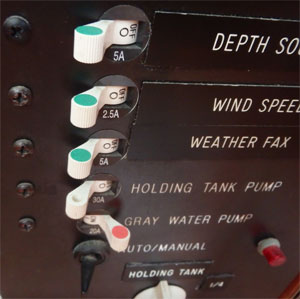
These circuit breaker switches are set up to accept color-coding indicators so that breakers can be set up in functional groups. |
Panel should have amp meter
The number of breakers on your electrical panel can seem a bit overwhelming at first glance, but take a few minutes and study them one at a time. Breakers are used to turn equipment on or off, and most builders clearly identify each breaker with a simple description of what it controls. Your ship’s electrical panel should have an amp meter that shows how much current is being used. I find it easier to learn your electrical panel at night, tied up to the dock and plugged into shore power so you are safe and secure. Watching the amp meter as you turn each breaker on and off to get a reading will help you better understand how much current each breaker draws. You may be surprised to see how hungry refrigerators and freezers are!
I’ve seen several trawler owners devise their own “color coding” system to help identify key breakers that should always remain on and to prepare for changing circumstance like transitioning to night running. Electric bilge pumps, for example, should be left on at all times (be careful, some toggle levers have an auto/off/on three-way feature and it’s easy to mistakenly turn off the pump when you think it is on). I have seen small star stickers placed next to nighttime operational breakers, such as running lights, compass lights, etc. Others use colored dots, colored insert plugs or colored wire ties for easy identification and then develop a quick reference reminder code; for example, use red for “normally off” (fuel transfer pumps) and green for “on when underway” (navigation communications, fresh water pump, etc.). Selene uses numbers on their panels in addition to the item descriptions so you can very easily create a start-up checklist to make preparation for underway a breeze with notes such as “Flip on numbers 4, 5, 7 and 10 while warming up your main engine.”
Blue Sea Systems makes a simple toggle guard plastic cover that prevents inadvertent flipping of breakers so that breakers that are normally left on are covered and protected so that they aren’t switched off by a careless sweeping of breakers when you are shutting down your boat and turning everything off.
You can also use thin white detailing tape to create borders on your electrical panel to help more clearly define the different power groups. You will typically have a 12V DC, 24V DC, 120V AC, 240V AC and a separate air conditioning section on most modern trawlers. Your electrical panels may also include separate sections for alarm features like fire suppression, water in fuel and bilge pumps. Boxing them in with detail tape can help you logically organize your breakers by function.
Regularly inspect your inverter to make sure the connections are secure, the cables aren’t chafing and that it is in a dry, protected environment and not getting any dust build up on the ventilation screens. If your inverter gets wet, it can short out and shut down. Most inverters have a dip switch setting that should be paired to the type of batteries you have on board (wet, lead acid, AGM, etc.) and it is important to confirm that your inverter is set up correctly. The inverter panel should have a menu you can scroll through that will allow you to adjust your settings to make sure you have a match to your type of batteries (read your manual to learn your options, you will typically set it up properly once and leave it, but it’s nice to know the optimum setting and write those settings down if you have to reboot).
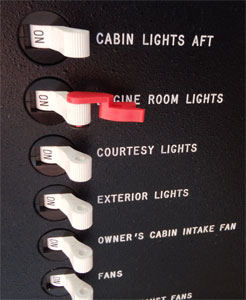 |
|
This shows a breaker reminder identifier. This is a visual and tactile way to remember to shut off or turn on a needed circuit. |
Many inverter manufacturers will provide a remote panel that boatbuilders install in the pilothouse so you can check on the status with a quick glance and you don’t have to actually crawl into the lazarette or the engine room to make manual adjustments on the actual inverter unit.
Due to their importance for running ships’ systems, I have seen many larger trawler owners set up two inverters so that if one fails, they can switch over to the other as a backup.
The duplex outlets that you plug in to are normally protected in each circuit by a GFCI duplex (ground fault circuit interrupter). These are required in wet areas (like heads and galleys) and they will shut down power if there is a fault. GFCIs placed in outside areas often have cover plates. To re-energize power, you simply push the reset button. One tip that I have shared with many of my customers is to make a “map” of the GFCI locations so that you know where to look if you have to reset one. I’ve seen GFCIs installed in out-of-the-way locations that are not always out in the open, so it’s better to find them before you need them.
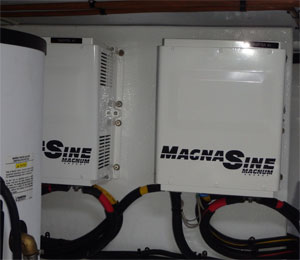 |
|
Two inverter/chargers side by side in an engine room. This setting provides easy access and good protection for the units. |
Generators vital
Generators can also produce AC power (120V and 240V) for electrical requirements at anchor or underway. It is quite common for electrical systems to be designed with the generator electricity routed through your inverter to your electrical panel. If your inverter is taken out of the loop (through a failure), you can’t run your 120V and 240V appliances unless you have an inverter bypass — a smart feature to add to give you more versatility, especially if you are traveling to remote locations. To run appliances off of 240V, you normally need to either have shore power or your generator running.
Generators play a vital role in helping you manage your ship’s larger electricity loads (air conditioning, laundry, cranes, etc.). We can explore more details on 240V equipment in a future article.
The DC and AC electrical systems on your boat are designed to collectively keep you running smoothly and in comfort. Another way I like to think about this is that your 12V DC system keeps your boat alive and your 120V AC lets you live aboard with all of the comforts of home. Taking some time to read the manuals and understand the installation diagrams will help you keep current with your electrical demands and hopefully these few pointers will help you keep your trawler dialed-in.
Jeff Merrill, CPYB, is the president of Jeff Merrill Yacht Sales — www.JMYS.com. He is a veteran yacht broker who provides individual attention and worldwide professional representation to buyers and sellers of premium brand, oceangoing trawlers. Merrill is active in the cruising community as a public speaker and writer and enjoys spending time at sea with clients. Jeff has written a series of “Dialing-In” your trawler articles for Ocean Navigator and is constantly looking for new ideas to improve and simplify the trawler lifestyle. If you have a suggestion or want to get in touch please e-mail Merrill at: trawlerspecialist@gmail.com

