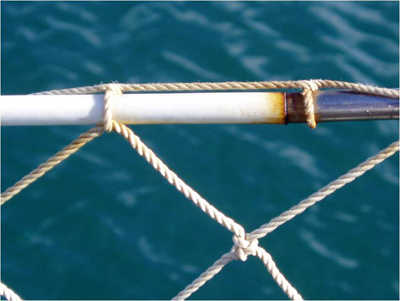
Putter around an anchorage or stroll through a marina and look objectively at lifelines. Most were made sometime long ago of vinyl-covered 7×7 wire and are loosely strung between marginal stanchions and are weeping rust at the terminals. And think a minute about the term ‘lifelines;’ these thin cables are meant to stop you from falling overboard should you stumble on deck.
In the Pacific Northwest, where we learned to sail, falling overboard into 45° to 50° F seawater meant you had about 15 minutes to live unless your partner or crew could quickly turn the boat and get you out of the sea. Falling overboard offshore can be even more catastrophic.
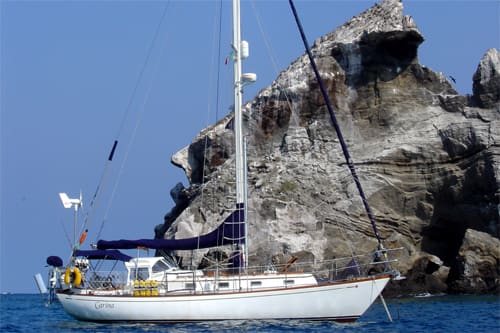
When we purchased our boat Carina and were using professional services to completely re-rig her, we unwisely chose vinyl-covered wire for our lifelines. After a number of years of full-time voyaging in the tropics, rust began to weep around the lifeline terminals and ever so slowly, irrefutable evidence mounted that the vinyl covering was trapping seawater and was causing the underlying 7×7 stainless steel wire to corrode. “Most old boats have been delivered with lifelines rigged with coated wire. Coated wire is an astonishingly bad idea,” writes well-known marine authority Don Casey.
 |
|
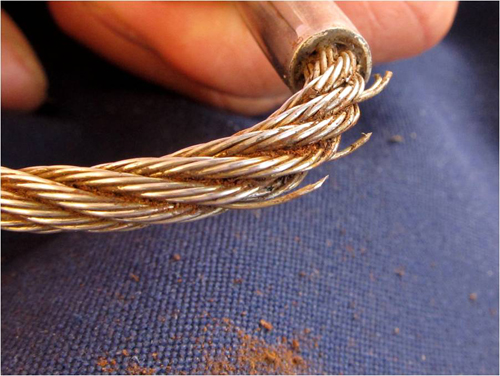
Rust stains provide irrefutable evidence of corroded lifelines. |
Assessing the situation
In evaluating our lifeline’s condition, we first stripped the vinyl coating off the existing wire to determine its status and to (hopefully) stop further degradation. This was easily accomplished using a box cutter and a pair of needle-nose Vise-Grips. We found that the underlying wire was rusted, not just at its terminations, but along its entire length. Bending the wire caused strands to break and released powdery rust particles. It did not take us long to conclude that choosing vinyl-covered wire for our lifelines, however attractive, had been a foolish decision.
By the time we discovered this problem, we were “out here” and our options for replacement were limited. To make new lifelines ourselves, we felt we had three options: swageless fittings (Suncor, Hi-Mod, etc.) with rigging wire; single braid line of grade SK75 or SK78 ultra high molecular weight polyethylene (or Dyneema, composition of Amsteel), or hand-crimped terminals on 3/16-inch 1×19 grade 316 stainless steel wire rope.
We did a bit of research to find out just how strong our lifelines should be and discovered that there is not much information available. You can calculate the force of a hypothetical 200-pound man falling against a lifeline at roughly nine knots — the speed you might be surfing down a wave — at 4,217 Newtons or about 950 pounds, but without a thorough analysis of how this force is transferred to all elements of the lifeline system, this number is meaningless. The 1998 U.S. Naval Academy studies on lifeline failure (published by US Sailing) and the ISAF Offshore Special Regulations (significantly updated in 2008) are, however, valuable resources.
One popular option of late is the use of ultra-strong, light weight Dyneema line, but we discarded this choice primarily because UV degradation of the lifeline would be impossible to track, and chafe where the line would pass through the stanchions would quickly affect its integrity. Also, if we used line we would need to buy a full set of new hardware appropriate for use with spliced braided line. Still, this option has a great deal of appeal if you are diligent about replacing the lifelines on a regular basis.
Mechanical or “swageless” fittings and uncovered wire seemed ideal in terms of strength and ease of installation, but the cost of the appropriate fitting kits would be about $1,000 USD. If we eliminated gates, we could possibly reduce this cost by about one third. And, though our gates are perpetually taped shut for passagemaking, we have found occasions when it was necessary to open them, so we wanted to retain gates in our lifelines. (This is permitted in the offshore rules.)
As an aside, for continuous pulpit to pushpit lifelines, one design option is to connect the lifeline to the pushpit, as well as the pulpit, using braided small diameter polyester line, rather than turnbuckles. In the event of a crew overboard situation (COB), the braided line can be cut quickly, allowing the lifelines to fall out of the way to facilitate COB retrieval.
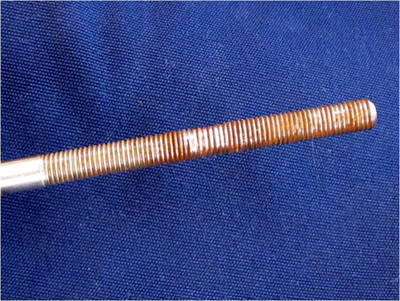
We settled finally on replacing our own lifelines using stainless steel hand crimp lifeline terminals and 3/16-inch, 1×19, grade 316 stainless steel wire rope at a cost of approximately $400 USD, including the cost of the tool. Except for the wire, all the fittings and the crimping tool were manufactured by Johnson Marine of East Haddam, Conn. Properly installed, these terminations are rated for 2,500 pounds pull out load, only slightly less than the breaking load specified in offshore racing rules for our sized vessel, that being the breaking strength of 5/32 stainless steel wire rope, or 2,800 pounds.
The 1×19 grade 316 wire rope is smooth and has a pleasant hand and, since it is uncovered, it is easily cleaned and inspected. Wire rope is also resistant to chafe, and not subject to degradation by UV radiation. We chose the bolt type crimping tool over the optional lever type tool primarily for cost and weight aboard even though the bolt tool requires five crimps while the lever tool calls for only three crimps for the completed terminal to sustain specified pull out loads.
Implementation
We tackled the project one-half lifeline at a time. By disconnecting the lifeline at the aft turnbuckle at the pushpit, we could remove the lifeline up to and including the gate, leaving the remaining (forward) section intact. Similarly, the forward section could be removed at the gate when the forward turnbuckle was released from the bow pulpit.
Before attaching any terminals to the new wire, we inspected all hardware and confirmed that the threads on the new hand crimp terminals matched that on the installed hardware, i.e., thread size and right-hand versus left-hand thread. We sometimes needed Vise-Grips when disassembling the hardware. We cleaned and lubricated threads as we went along.
Cutting wire is accomplished easily by marking the cut site with a marking pen and then taping the wire close to and on either side of the cut site using duct tape. Make sure the cable cutter is held perpendicular to the wire to get a square cut.
 |
 |
|
Top, degraded 7×7 wire that was vinyl-covered is clearly no longer reliable and needs replacement. Above, In addition to checking the condition of lifeline wire, check hardware integrity as well. This turnbuckle needs replacement. |
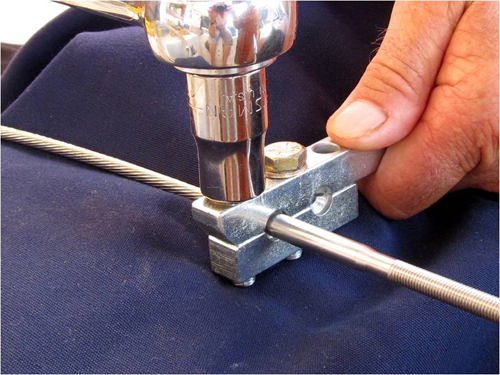
Slip terminals onto cut wire, gently rotating with the wire lay, and then push firmly to confirm wire is fully seated. Slide the crimp tool over the terminal/wire assembly and, using a half-inch box wrench, tighten bolts until the jaws just begin to tighten. Switching to a half-inch socket on a half-inch drive socket wrench or T-bar, tighten each bolt a quarter turn and switch back and forth until both bolts are tightened snugly and no gap can be seen between the two dies of the jaw. A vise, if available, would work well to secure the tool during crimping. We did not have a vise, but worked as a team.
The hand crimp tool manufacturer (Johnson Marine) does not call for a specific torque for tightening bolts and in our zeal to make the crimps as tight as possible, we actually broke one of the hardened steel bolts of the tool during this project. Hoping to source replacement bolts locally, we e-mailed Johnson Marine to get the bolt’s specifications. They promptly replied and insisted on shipping to Fiji a replacement tool at no cost to us. Besides better quality products, this kind of service is another reason why we like to buy USA-manufactured products from a reputable company.
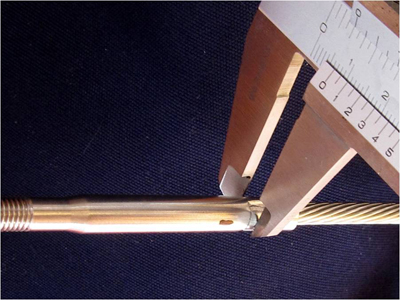
After crimping, loosen the bolts and confirm with a caliper that the dimensions of the crimp meet the specified diameter (in our case, 0.260 inch for a 3/16-inch terminal).
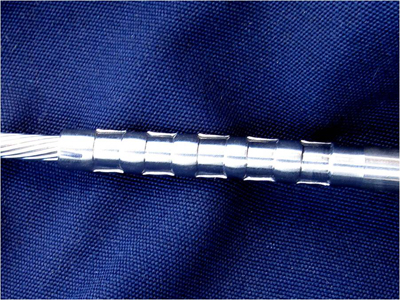
Move and position the tool to create the next crimp an eighth-inch farther down the terminal, and oriented exactly the same way. Continue this process until five crimps have been made.
 |
 |
 |
 |
|
Top, Position the crimp tool over the barrel of the terminal. Second from top, tighten the crimp tool with a socket. Third from top, use calipers to get the right crimped dimension. Above, the completed crimped fitting. |
Measure and cut wire and install terminal at the other end of the section. Be sure to measure for new wire based upon the overall length of the assembly; hand crimp terminals are longer than machine crimp terminals.
Upon reassembly, treat threads of eyes, turnbuckles and locking nuts with thread locking compound.
Finally, include a thorough check of lifeline and lifeline fittings on your pre-passage checklist to ensure continued integrity — your life could depend on it.
Replacing lifelines does not have to be an expensive or onerous project and it is one that is too often neglected. Based upon what we found when we disassembled our own lifelines, we would strongly recommend that anyone with vinyl-covered wire of any age, consider replacing it with uncovered wire or even low stretch, single braid UHMW polyethylene line, providing the line can be replaced at regular intervals.
Of course, lifelines are only part of a comprehensive safety system that includes harnesses and tethers; jacklines; hardware such as cotter pins, turnbuckles, gate hooks, etc.; stanchions and their bases; the bow pulpit and the pushpit — but that’s another story.
—————-
Leslie Linkkila and Philip DiNuovo have lived aboard and cruised their Mason 33, Carina, for more than seven years. Their Pacific adventures have taken them through Central America, Ecuador and the Galápagos; they are now in the South Pacific islands. Follow their adventures at www.sv-carina.org.