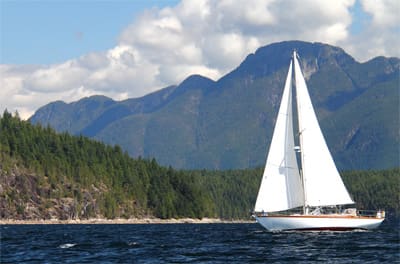
Knowing some traditional navigation skills not only adds to voyaging safety, but gives a wonderful feeling of satisfaction and self-reliance in an era of powerful technology. Recently my husband Seth and I sailed our newly-purchased Francis Kinney designed cutter Celeste up the coast of British Columbia with nothing more than a hand-held GPS. These devices eat batteries about as fast as a 747 goes to windward, so most of the time we found our way with simple, old-fashioned coastal navigation.
An electronic depth sounder or a traditional lead line can be a useful tool not only for avoiding running aground, but for confirming your position within the general area where you know yourself to be. Seth and I used this method on our British Columbia cruise when navigating around the reefs off Savary Island south of Desolation Sound. We had anchored there for the night, and in order to depart we had to leave a long, tongue-shaped reef to starboard. By comparing our chart to our depth sounder, we knew exactly when we had cleared it. A knotmeter/miles-logged instrument is also helpful for the obvious reason that it indicates your speed through the water and the miles you have sailed. This doesn’t always translate to the miles you have covered over ground, but it’s an excellent starting point. Often the knotmeter is a three-in-one instrument with the depth sounder. An old-fashioned streaming log works too, the standby tool for dead-reckoning in days past.
 |
|
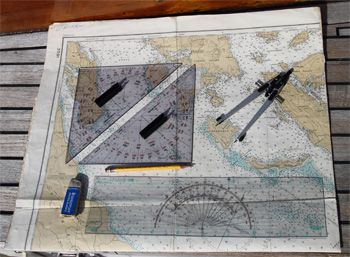
Paper charts, triangles, dividers, a pencil and a plotting protractor are the basic set of plotting tools. |
Finding a course
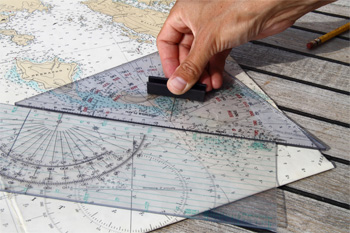
You mark your starting position, say your anchorage for the night, and then a waypoint at the first place where you will have to change course, a shoal or an island for example. Draw a line between them with the first triangle or with a straight-edged protractor. Lay the long edge of the second triangle alongside the protractor. There are three heavy dark lines on the triangle: note the point where they meet. Slide this second triangle along the line of your course and thus along the protractor until that point is on a line of longitude. The number (degree) marked on the triangle that is lying on the line of longitude indicates your true course.
There are actually two degrees indicated: your course and its reciprocal (e.g., 90 and 270). From this you will have to calculate the magnetic variation by referring to the compass rose on the chart in order to figure your magnetic course. One should also factor in the deviation of your compass, although this is usually not a major concern for a small cruising yacht. It is also important to be aware of currents, how strong they are and in which direction they might be setting you off course. Tide tables and a good chart help with this. (See “Set & drift calculations,” Issue No. 209, Ocean Voyager 2013 for how to determine your course to steer to compensate for current.)
 |
|
Determining a course with a triangle and a protractor. |
 |
|
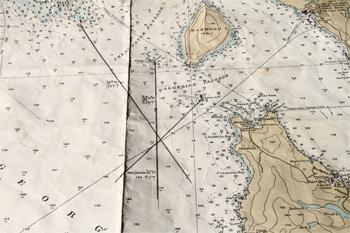
Getting a fix position with three bearings. |
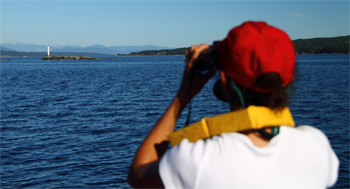
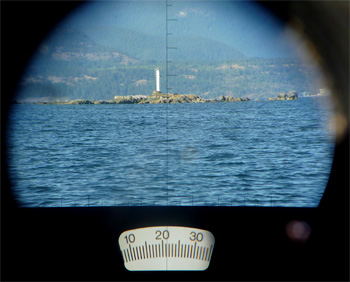
It is not always possible to stay perfectly on course even without tidal currents, however. Tacking to windward, for insistence, requires that you head off your course by quite a bit on each tack. So it’s useful to have a way of pinpointing your position. With a hand-bearing compass, or even better, with a pair of binoculars with a built-in compass, take a bearing off a prominent landmark. Using your triangles or parallel rulers, draw a line on the chart through the landmark along that bearing. Remember to correct first for magnetic variation. The degrees indicated on the triangle are true, while those given by the hand-bearing compass or compass binoculars are in magnetic.
Take another bearing off a second landmark and draw a second line. Because your bearings will not be entirely accurate, take a final bearing off a third landmark and draw your last line. The three lines should come together in a small triangle. The size of the triangle gives you an idea of how accurate your position is, although you may not in fact be inside it.
 |
|
Leonard takes a bearing off Rebecca Rock, Strait of Georgia, British Columbia. |
Measure distance with latitude
Using latitude and longitude if you have a hand-held GPS is, of course, the easiest way to figure out your position short of a chartplotter. A protractor is an excellent tool for marking your position and waypoints on the chart. Simply line up the edge of the protractor with your waypoint, ensuring that the parallel lines on the protractor remain parallel to the lines of longitude (or latitude) marked on the chart, and read the position off the side of the chart. Perform the reverse to mark your known position. When the protractor doesn’t reach all the way to the edge of the chart, a pair of dividers are useful. To measure longitude, for example, place a triangle with one edge on the nearest line of longitude; line up the corresponding 90° edge with your point; and measure the distance using dividers. (If the angle between your point and the line of longitude isn’t 90°, the distance measured will be too long.) Then measure the distance by placing the dividers on the longitude side of the chart. Remember that a degree of latitude is always 60 nautical miles no matter where you are on the globe whereas degrees of longitude squeeze increasingly closer together in higher latitudes. It is therefore essential to measure distance using the latitude scale.
 |
|
Binoculars with built-in compasses make bearing taking easy. |
Coupled with a hand-held GPS or a fixed mount GPS without a chartplotter, dividers are also helpful for determining the distance from a course between two waypoints and any dangers lying near it. Using your triangles, draw a line towards the danger in question exactly perpendicular to your course. Then use your dividers to measure that line, calculating its length (distance) by placing the dividers on the latitude side of the chart and counting off the minutes. Since we are measuring distance in nautical miles, only the latitude side will give us an accurate reading.
Finally, enter the waypoints determining your course in the GPS and find the display page showing cross track error (XTE). XTE is the boat’s distance from your intended course. It indicates how many miles, even feet, you are off course and in which direction (right or left). Using this method will show you precisely how far you can stray from your track and is good practice even for navigators with chartplotters. If you know how far it is from your course to a reef or other obstacle (having calculated it with your dividers), you can beat to windward, or sail reach-and-reach downwind, knowing exactly when you have to tack or jibe.
In many ways, electronic navigational aids, GPS chartplotters and integrated systems foremost among them, have made voyaging safer and easier. But they can fail and voyagers need to know how to manage without them. Learning and practicing these simple skills not only makes voyaging more interesting, but is some of your best boat insurance.
——————
Ellen Massey Leonard completed a 32,000-mile westward circumnavigation in 2010 at age 24. She and her husband Seth made the voyage aboard Heretic, their former 38-foot cutter. They now split their time between voyaging aboard their new-to-them 40-foot Francis Kinney designed cutter Celeste and working in Switzerland, where Ellen is completing a book about their circumnavigation.